
Today, we are going to talk about Rufus software. This utility was developed to make bootable USB devices quickly and easily. As some of you already may know, there are many different applications available to Windows users for creating bootable USB sticks. But Rufus offers a significant speed advantage compared to other open-source software. Rufus’s most highlighting features are its compatibility for a large amount of Linux distributions, its portability and its support for both Windows and Linux platforms.
In general, Rufus works great with USB 2.0 and faster USB connections like USB 3.0. It is also compatible with both legacy BIOS and UEFI firmware. Not only that, but Rufus is also compatible with a large number of bootable .iso file types, including many Linux distributions and Windows installation .iso files, as well as raw disk image files. If you are interested in making a bootable USB device by yourself, you can follow the instructions below.
How to Use Rufus to Install an Operating System
- Before beginning, you have to enable booting via USB in your BIOS. To do this, you can press the designated key at startup to enter your BIOS settings. Then go to the “Boot” tab and you will find this setting there. Simply, enable it, save it and restart your computer.
- Now you need a USB drive with at least 16GB of storage to contain the installation files of the OS.
- After preparing the USB drive, now it is time to download the .ISO file of your preferred OS. Go to the official website of your preferred OS and download the .ISO file from there.
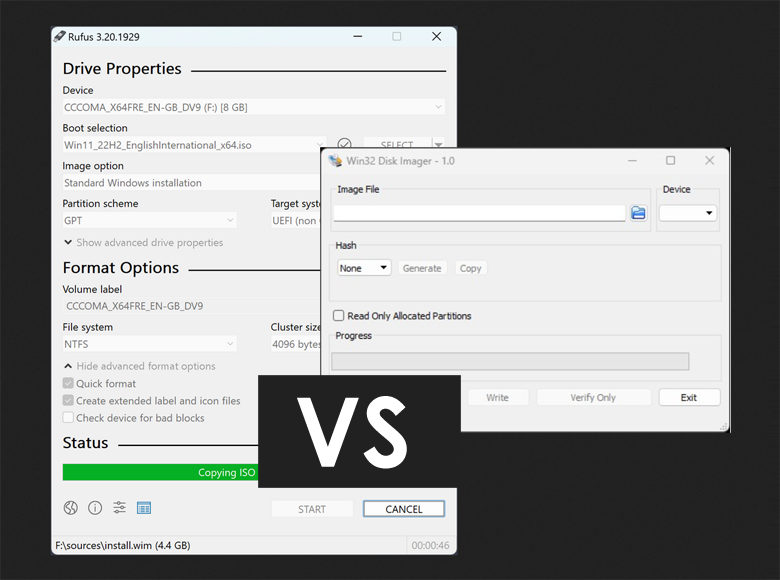
- Now download Rufus or win32 disk imager, from their official websites and install one of them your computer.
- Launch the program you’ve downloaded and load the .ISO file that you’ve downloaded into the program. It will show up on the ISO file area of the program window.
- After that, plug the USB drive into the computer and wait while it gets detected by Rufus or Win32 Disk Imager.
- After it gets detected, click on the “Start” button and the bootable USB creation process will start. This process will format your USB drive and copy the installation files on to it. Therefore, please give it a good 5 to 10 minutes to finish.
- Once, everything has completed the software will show you a notification on your computer screen. If you receive that, you can leave your USB drive on your computer and restart your computer to test your bootable drive. Since we enabled the booting via the USB feature earlier, your PC should restart and use the USB drive to boot.